


Starlink Accredited Installers In Rwanda
KSh 10,000.00
Installation Process
At starlinkkenya254, we have established the industry standard when it comes to quality and durability of installation.
Our technicians follow a structured and reliable process to ensure consistent quality across all installations.
The system has been outlined in the diagram below.

1. SURVEY

2. PLAN
Select optimum mount to use for the Starlink dish, and the most efficient cable route from the dish to the interior router. Devise the best positioning for the interior cable wall outlet and Starlink router prior to installation.

3. INSTALL
Firmly mount the Starlink dish to the roof or wall of the building. Drill necessary holes through the roof and/or walls for the Starlink’s cable to pass through. Any exterior cable must be firmly pinned down. Feed the cable into the building and waterproof the entry holes. Cut out and install an interior wall outlet near the Starlink routers position, whereby the cable will pass through into the house’s interior.

4. SET-UP
Connect the Starlink router and dish cable to the power block, then plug the power block into a power outlet inside. Download the Starlink app and follow the prompts to set up the network connection.

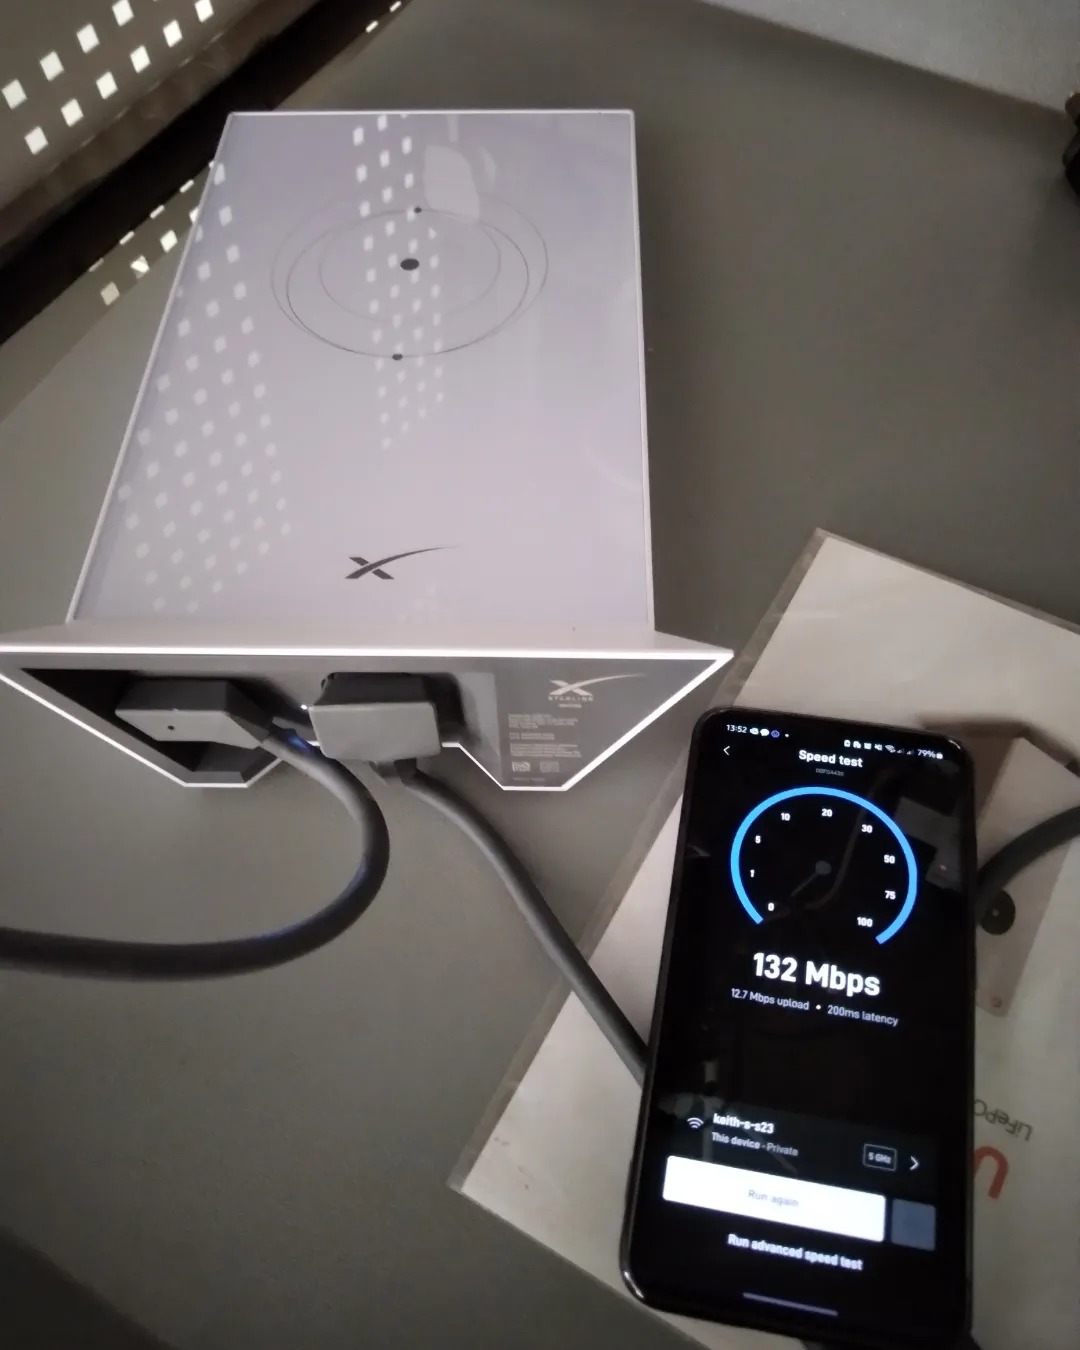
5. TEST
Run a speed test to check the download and upload speed. Internet connection must be fast and effective before leaving the install site. Welcome to Starlink’s rapid internet connection!

Ready To Get Your Starlink Installed?
Starlink Installation Guide
Starlink is one of the best satellite internet providers available right now. It offers fast speeds, plenty of data, and several plans that suit almost any need. However, Starlink internet requires self-installation, which means you may need a little help getting set up.
That’s where we come in—in this article, we walk you through the process and answer the most common questions about installing Starlink internet service. Let’s get started!
Starlink’s self installation process might be a bit easier (so long as nothing goes wrong), but Hughesnet and Viasat’s professional installation is free. Compare these satellite internet providers to see what kind of installation process you’re most comfortable with.
Does Starlink charge for installation?
Starlink does not charge for installation. This is good, because the only installation option is self-install. Starlink ships the equipment to you, and you have to set it up yourself.
That said, you do need to pay for equipment. Unlike some other providers, Starlink doesn’t bundle hardware costs into your monthly bill. You pay a single up-front charge. The price varies depending on your plan and equipment, but, to be frank, none of them are cheap.
Starlink Standard and Starlink Roam equipment is much more affordable than the other options, primarily because it uses a less high-tech dish with slower speeds.
Depending on your particular needs, you may also need to purchase some additional mounting accessories for your Starlink satellite dish. These include various mounts to fit the dish to a roof, extend it higher off the ground, or route cables through a wall. Unfortunately, these are not included in the prices above.
Starlink’s prices are a lot more than you pay for competitors Hughesnet and Viasat. On the plus side, though, you only have to buy the equipment once, then you own the equipment. You could even potentially sell it to recoup some of the cost later on.
How does Starlink installation work?
Once you place your order, you have the option to order any of the accessories you need. After that, Starlink ships your equipment to you.
Once it arrives, you need to download the Starlink app and set up the antenna. The app assists with finding a clear view of the sky, which is necessary to get the strongest signal and best service.
Once that’s done, you can hook up the equipment, which is a very simple process. In fact, the whole Starlink installation process is surprisingly straightforward. The only potential difficulty can be mounting your dish to a roof or other hard-to-reach spot.
How do you install Starlink internet?
Starlink installation is fairly simple. However, the instructions that come with your equipment leave a little something to be desired—they’re just line drawings without any text or written instructions. Never fear, these are the basic steps involved in setting up your Starlink internet.
1. Unbox the equipment
Your Starlink installation kit includes the dish, its stand, a wireless router, and the cables you need to connect everything. Open your kit to make sure everything you need is in the box and intact.
2. Install the Starlink app
Grab your smartphone and install the Starlink mobile app on iOS and Android. You use this during installation to help find the optimal location for the dish. Afterwards, you use it to set up your Wi-Fi network, manage settings, and get support.
3. Assemble the dish and stand
Unplug the cable from the satellite dish. Insert the pole on the dish into the mounting base, ensuring the groove lines up with the protruding rail in the base. Then, reconnect the cable at the bottom of the unit. The connector should click into place.
4. Find the best spot for the dish
The app walks you through the process of finding the best spot to put your dish, which needs a clear, unobstructed view of the sky to capture the best signal.
Just head outside, open the app, and start the setup process. The app instructs you to scan the sky with your phone’s camera. When you’re done, it lets you know if you can get a clear signal from that location.
Some ideas for areas to mount your dish include open fields (or an open spot in your yard), the roof of your home, or on top of a shed or garage. The dish doesn’t need to be elevated, but doing so can help avoid obstructions.
Note that the dish’s alignment doesn’t matter at this point. Once you set things up and get online, the antenna automatically adjusts its angle to ensure the best reception.
5. Mount the dish
Once you’ve found a suitable spot, go ahead and mount the dish. This can be as simple as setting it on the ground. You may also want to stake it down. If you’re mounting it to a rooftop or wall, use the accessories you ordered when signing up for service.
6. Connect the cables
Finally, connect the cable from the dish to the wireless router, and then connect the router to power.
At this point, head back to the app to configure your wireless network and finish setup.
Starlink internet equipment
Starlink customer service
The Starlink installation process is very straightforward, and we don’t anticipate most people having many (or any) issues. If you do find yourself needing help, however, you’re going to run into one of our biggest complaints about the service—the customer support.
It’s not that Starlink’s support is bad, per se. It’s just hard to reach a person. In fact, your only real option is to submit a support ticket through the app and wait for someone to contact you. There’s no apparent email, phone number, or chat you can use to contact someone directly.
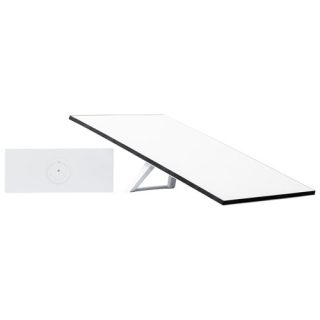
Starlink equipment consists of just an antenna and a modem/router combo. There are three antenna models:
- Standard: This is the basic Starlink antenna. It’s a one-time $599 purchase and is intended primarily for home users.
- High Performance: The Starlink High Performance dish is for businesses and “high demand users.” You don’t need to run a business to get this antenna, but this antenna delivers faster speeds and can scan a larger portion of the sky from any given angleto pick up more satellites and provide a stronger signal (for faster speeds and better streaming support). Be aware, however, as this costs $2,500.
- Flat High Performance: This dish is similar to the High Performance option, but it’s, well, flat. It’s intended to be mounted to the roof of a vehicle and used in motion. The cost is $2,500—the same as the regular High Performance antenna.
The wireless router is an extremely simple device designed to translate the satellite signal received from the antenna and broadcast it as a Wi-Fi network. You handle all the configuration and setup in the mobile app, which makes it much easier to manage than the typical wireless router. No complaints here. It gets the job done and is more than capable of handling the speeds offered by Starlink service.
Starlink installation FAQ
Can you install Starlink yourself?
Yes! In fact, self-installation is the only option. On the plus side, this means you don’t really need to worry about scheduling issues or installation fees. It does mean more work, but fortunately, Starlink’s setup process is pretty simple—most people don’t need to worry about installing it.
How hard is it to set up Starlink?
Setting up Starlink service is surprisingly simple. The hardware is easy to put together, and the app guides you through the process of finding the best location for the dish and setting up your wireless network. Most users can get their Starlink internet set up without much trouble at all.
How much does Starlink cost?
Starlink’s costs vary widely depending on the specific plan and hardware you choose. The two main associated costs are the monthly service fee and the one-time equipment fee. Here’s the breakdown:
Only logged in customers who have purchased this product may leave a review.
Related products
-
STARLINK Standard Satellite Antenna Wifi Router Kit
KSh 55,000.00Add to cartEngineered by SpaceX, Starlink is designed to deliver high-speed, low-latency internet to the most rural and remote locations around the world. Starlink enables activities that historically have not been possible with satellite internet, including streaming, online gaming, video calls, and more. Your Starlink Kit is designed for self-install and arrives with everything you need to get online within minutes.
-
Stream movies, make video calls, play online games and more
With Starlink, users can engage in activities that historically have not been possible with satellite internet.
-
Monthly service plan required
Standard Kit is best paired with the Residential & Roam service plans. Residential: for use at a fixed location, may not be available in all areas. Roam: for use at any location where Starlink has coverage, immediately available.
-
Easy self-install
Your Starlink Kit arrives with everything you need to get online including your Starlink, Wi-Fi router, cables, and base.
-
No contracts, cancel service at any time
Try any Starlink service and if not satisfied, cancel service at any time.
-
Works anywhere with a clear view of the sky
Starlink needs a clear view of the sky to connect to satellites.
-
Weather resistant
Designed and rigorously tested to handle a wide range of temperatures and weather conditions.
-
Manage Starlink on the mobile app
Download the Starlink app to check which service plans are available in your area and to determine the best set up location before install.
What’s Included
-
Standard
-
Kickstand
-
Gen 3 Router
-
Starlink Cable (49.2 ft)
-
AC Power Cable (4.92 ft)
-
Power Supply (4.02 ft)
-
-
Add to cart
Experience uninterrupted connectivity even in remote areas with the STARLINK standard kit. It includes a Gen 3 Router featuring Wi-Fi 6 technology for efficient coverage up to 297 square metres with support for 235 devices, enhancing efficiency. Designed to withstand various weather conditions, it ensures reliable performance in challenging environments.
About This Product
- Kit includes a kickstand, Gen 3 Router (with 2 Ethernet ports), cables, and power supply for your convenience
- Wi-Fi 6 has a coverage of up to 297 square metres and supports connectivity for 235 devices, for better efficiency
- Starlink service plans cater to both stationary and mobile use, and allows you to select a service plan tailored for your specific needs
- Offers flexible installation options with mounts and accessories available for permanent setups
- Facilitates easy setup with just two steps, plug it in and aim at the sky (requires a clear view of the sky)
- Needs an unobstructed view of the sky to establish satellite connectivity
- Built tough to endure snow melting, sleet, heavy rain, and harsh winds
Important information:
- Outside Region Fee: Starlink Kits activated outside of the region they were originally sold are subject to an “Outside Region Fee.” If you purchased a Starlink Kit from an unauthorized reseller, it is possible that the Outside Region Fee may apply to your order. To avoid this charge, please ensure you are purchasing Starlink from an authorized channel like an authorized retailer within your region. See applicable fees in USD by region and Starlink Kit type: $200 USD.
Note: The fee may be applied in USD or local currency if supported in your activation country. Based on foreign exchange volatility and local taxes, there may be some variance in the charge applied to your account if you are subject to an “Outside Region Fee”.
-
Rent to Own – Starlink Standard Satellite V3
KSh 55,000.00Add to cartEngineered by SpaceX, Starlink is designed to deliver high-speed, low-latency internet to the most rural and remote locations around the world. Starlink enables activities that historically have not been possible with satellite internet, including streaming, online gaming, video calls, and more. Your Starlink Kit is designed for self-install and arrives with everything you need to get online within minutes.
-
Stream movies, make video calls, play online games and more
With Starlink, users can engage in activities that historically have not been possible with satellite internet.
-
Monthly service plan required
Standard Kit is best paired with the Residential & Roam service plans. Residential: for use at a fixed location, may not be available in all areas. Roam: for use at any location where Starlink has coverage, immediately available.
-
Easy self-install
Your Starlink Kit arrives with everything you need to get online including your Starlink, Wi-Fi router, cables, and base.
-
No contracts, cancel service at any time
Try any Starlink service and if not satisfied, cancel service at any time.
-
Works anywhere with a clear view of the sky
Starlink needs a clear view of the sky to connect to satellites.
-
Weather resistant
Designed and rigorously tested to handle a wide range of temperatures and weather conditions.
-
Manage Starlink on the mobile app
Download the Starlink app to check which service plans are available in your area and to determine the best set up location before install.
What’s Included
-
Standard
-
Kickstand
-
Gen 3 Router
-
Starlink Cable (49.2 ft)
-
AC Power Cable (4.92 ft)
-
Power Supply (4.02 ft)
-
-
Starlink V3 High-Speed Low Latency Internet Standard Kit
KSh 55,000.00Add to cartEngineered by SpaceX, Starlink is designed to deliver high-speed, low-latency internet to the most rural and remote locations around the world. Starlink enables activities that historically have not been possible with satellite internet, including streaming, online gaming, video calls, and more. Your Starlink Kit is designed for self-install and arrives with everything you need to get online within minutes.
-
Stream movies, make video calls, play online games and more
With Starlink, users can engage in activities that historically have not been possible with satellite internet.
-
Monthly service plan required
Standard Kit is best paired with the Residential & Roam service plans. Residential: for use at a fixed location, may not be available in all areas. Roam: for use at any location where Starlink has coverage, immediately available.
-
Easy self-install
Your Starlink Kit arrives with everything you need to get online including your Starlink, Wi-Fi router, cables, and base.
-
No contracts, cancel service at any time
Try any Starlink service and if not satisfied, cancel service at any time.
-
Works anywhere with a clear view of the sky
Starlink needs a clear view of the sky to connect to satellites.
-
Weather resistant
Designed and rigorously tested to handle a wide range of temperatures and weather conditions.
-
Manage Starlink on the mobile app
Download the Starlink app to check which service plans are available in your area and to determine the best set up location before install.
What’s Included
-
Standard
-
Kickstand
-
Gen 3 Router
-
Starlink Cable (49.2 ft)
-
AC Power Cable (4.92 ft)
-
Power Supply (4.02 ft)
-
-
Starlink Standard Kit
KSh 55,000.00Add to cartExperience uninterrupted connectivity even in remote areas with the STARLINK standard kit. It includes a Gen 3 Router featuring Wi-Fi 6 technology for efficient coverage up to 297 square metres with support for 235 devices, enhancing efficiency. Designed to withstand various weather conditions, it ensures reliable performance in challenging environments.
About This Product
- Kit includes a kickstand, Gen 3 Router (with 2 Ethernet ports), cables, and power supply for your convenience
- Wi-Fi 6 has a coverage of up to 297 square metres and supports connectivity for 235 devices, for better efficiency
- Starlink service plans cater to both stationary and mobile use, and allows you to select a service plan tailored for your specific needs
- Offers flexible installation options with mounts and accessories available for permanent setups
- Facilitates easy setup with just two steps, plug it in and aim at the sky (requires a clear view of the sky)
- Needs an unobstructed view of the sky to establish satellite connectivity
- Built tough to endure snow melting, sleet, heavy rain, and harsh winds
Important information:
- Outside Region Fee: Starlink Kits activated outside of the region they were originally sold are subject to an “Outside Region Fee.” If you purchased a Starlink Kit from an unauthorized reseller, it is possible that the Outside Region Fee may apply to your order. To avoid this charge, please ensure you are purchasing Starlink from an authorized channel like an authorized retailer within your region. See applicable fees in USD by region and Starlink Kit type: $200 USD.
Note: The fee may be applied in USD or local currency if supported in your activation country. Based on foreign exchange volatility and local taxes, there may be some variance in the charge applied to your account if you are subject to an “Outside Region Fee”.
Reviews
There are no reviews yet.